Understanding Professional Spray Foam Removal
What is Spray Foam?
Spray foam insulation is a type of insulation formed by mixing two chemical components: isocyanate and polyol resin. When these components are combined, they expand and solidify, creating a durable, energy-efficient barrier against moisture and outdoor elements. This insulation method provides significant thermal resistance and can fill gaps, making it an attractive option for homes and commercial structures. However, when it becomes damaged, outdated, or if a building’s insulation needs to be changed, spray foam removal is essential to restore the structure’s integrity and comfort.
Why Remove Spray Foam?
There are several compelling reasons to opt for professional spray foam removal. Firstly, spray foam can degrade over time due to exposure to chemicals, moisture, or even extreme temperatures. This degradation can lead to reduced effectiveness in insulation. Secondly, if there are any underlying issues such as mold, water damage, or structural problems in the walls or ceilings covered by spray foam, removal becomes necessary to address these issues effectively. Additionally, homeowners may want to replace the insulation with a more modern material or convert the usage of a space, making professional spray foam removal a practical choice. For effective service, it’s crucial to consider professional spray foam removal techniques.
Common Challenges in Removal
Removing spray foam insulation can be quite challenging. One of the most significant hurdles is its adhesion properties, as foam is designed to bond tightly to surfaces. This makes it difficult to pry off without damaging the underlying material. Furthermore, the removal process can create a significant amount of dust and debris, which can complicate cleanup and pose health risks if inhaled. Lastly, improper removal techniques may contribute to structural damage, leading to increased repair costs. Understanding these challenges helps in planning and executes the removal effectively.
Preparing for Spray Foam Removal
Tools and Equipment Needed
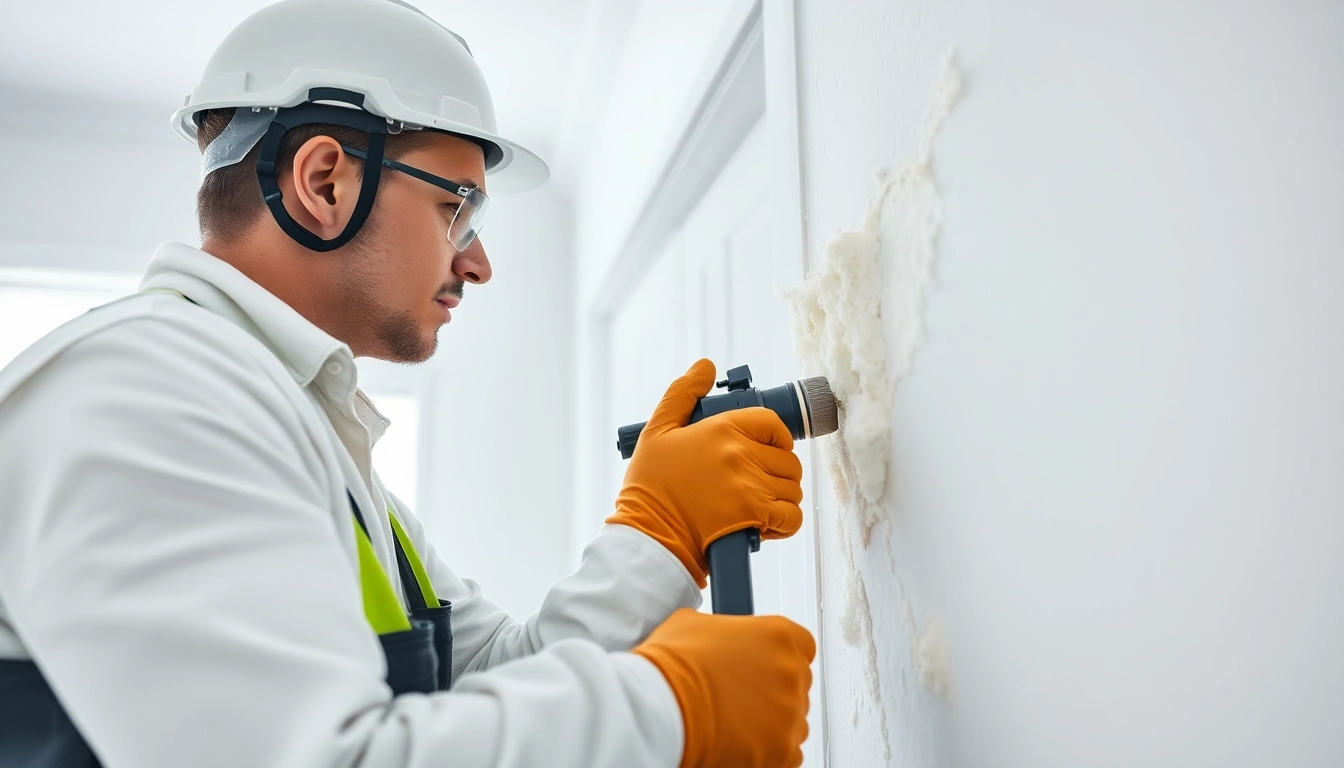
Before embarking on the spray foam removal process, having the right tools and equipment is vital to ensure efficiency and safety. Essential tools include:
- Reciprocating saw or oscillating multi-tool to cut through the foam.
- Utility knife for scraping off thinner layers.
- Heat gun to soften the foam for easier removal.
- Vacuum cleaner equipped with a HEPA filter for cleanup.
- Protective gear such as gloves, goggles, and masks to prevent inhalation of dust and particles.
Safety Precautions to Follow
Safety must always come first when working with spray foam removal. Essential precautions include:
- Ensure proper ventilation in the area to prevent inhalation of harmful fumes.
- Wear protective clothing, gloves, and full-face masks to shield against exposure.
- Disconnect any electrical sources near the removal area to prevent accidents.
- Check for structural damages or electrical wiring hidden within the foam before starting the removal.
Assessing the Area Before Removal
Careful assessment of the removal area is crucial before starting the process. Identify any underlying issues that may necessitate further repairs, such as water damage or mold. Understanding the type of foam used, its thickness, and the surface it adheres to can also inform the best removal technique. Taking these factors into account can help in choosing the most effective approach, therefore saving time and reducing the risk of property damage during the process.
Steps for Effective Spray Foam Removal
Removing Foam from Walls
When tackling spray foam removal from walls, begin with the following steps:
- Use a utility knife to score the foam around the perimeter, allowing for easier lifting.
- Employ a reciprocating saw or multi-tool to cut through the foam if it is thick.
- Utilize a heat gun to soften the foam in stubborn areas, allowing for easier peeling and scraping.
- Carefully pull off the foam, taking care not to damage the drywall beneath.
Best Practices for Ceiling Removal
Ceiling removal can introduce additional challenges due to gravity and awkward angles. Best practices include:
- Always work from a stable ladder or scaffold to maintain balance while removing foam.
- Score the edges and use a heat gun to loosen the foam before trying to peel it away.
- Be prepared for debris to fall during the removal process; covering surfaces below can ease cleanup.
Dealing with Difficult Areas
Difficult areas, such as corners or tight spaces, can present unique challenges. For these situations:
- Use a corner scraper tool to reach tight edges without damaging adjacent surfaces.
- A carefully angled utility knife can help cut away foam in curves.
- Sometimes, mechanical removal tools may be necessary to tackle large or stubborn areas.
Post-Removal Considerations
Cleaning the Workspace
Once the spray foam is removed, thoroughly cleaning the workspace is essential. First, start with a vacuum equipped with a HEPA filter to collect any dust and foam debris. Next, wipe down all surfaces with damp rags to eliminate any remaining particles and ensure the area is safe for re-insulation procedures. Proper cleanup helps in providing a clean slate for subsequent work and reduces the risks associated with inhaling foam remnants.
Inspecting for Damage
After removal, inspect the surfaces for any damage that may have occurred during the foam’s lifespan. Check for moisture, mold, or deterioration of wood or drywall materials. If any issues are identified, they should be addressed prior to re-insulation to ensure the longevity and effectiveness of the new material. Documenting these damages can also assist in necessary repairs.
Preparing for New Insulation
After ensuring the workspace is clean and any damage is repaired, it’s time to consider new insulation options. Choose insulation that aligns with your home’s structural integrity and local climate. Additionally, consult with experts to determine the best materials for maximizing energy efficiency and comfort in your home. Proper preparation and selection will play a crucial role in staying within your budget and meeting your insulation needs.
FAQs About Professional Spray Foam Removal
How long does professional spray foam removal take?
Typically, removal can take several hours to a few days, depending on the area size and foam application.
Is spray foam removal safe for my home?
Yes, when performed by a qualified technician, it is safe and minimizes damage to your property.
What should I do after the removal process?
Inspect the area, clean thoroughly, and consider re-insulating if necessary.
Will removing spray foam affect my home’s temperature?
Yes, it may impact insulation effectiveness temporarily until replaced. Proper planning is essential.
Can I remove spray foam myself?
While possible, it is recommended to hire professionals to ensure safety and effectiveness.